
The four-hand operation dentistry technique revolutionizes dental procedures by optimizing teamwork between the dentist and assistant, ensuring precision and efficiency. This method streamlines instrument transfer, suction control, and patient positioning, cutting treatment time by up to 30% while minimizing operational errors. Patients benefit from reduced mouth fatigue and anxiety through seamless workflows, while practitioners prevent occupational strain via ergonomic coordination. Trusted by 5,000+ clinics globally, it sets the gold standard for modern dental care—enhancing outcomes, safety, and comfort simultaneously.
01 Principles of four-hand operation
Four-hand sitting operation
Doctors and assistants use sitting operation from beginning to end during treatment, sitting in a balanced posture and maintaining a good posture, so that they can continue to work without harming their health.
Form a medical team
Use well-trained oral assistants of various types to form a medical team with doctors to work together. The doctor plays a leading role and is responsible for planning and treatment; the assistant cooperates and is responsible for arranging patients, preparing treatment supplies, dispensing materials, delivering and recovering instruments, and using suction devices to remove water and waste from the patient’s mouth in time. Doctors and assistants operate in an orderly manner and cooperate tacitly.
Reasonable arrangement of treatment plan
Reasonable arrangement of treatment plan mainly organized and implemented by doctors. Including reasonable organization and arrangement of each part of clinical treatment operation, such as analyzing the condition, making plans, selecting equipment, arranging personnel, practicing and evaluating the plan, etc., and arranging it into an efficient procedure.
Simplify work
Simplify all work to the greatest extent, including using prefabricated materials, such as sterilized paper tips, silver mercury capsules, etc., which can simplify steps and save time; using multi-purpose instruments, such as double-headed tools, can reduce the purchase, disinfection, storage of tools and reduce the number of transfers during surgery; such as using a three-purpose spray gun, during treatment, you only need to use your thumb to change the button to get the required water, dry air or gas-water spray, so that a tool can play the maximum effect and use it to the maximum extent, which can avoid unnecessary instrument exchange.
02 Equipment required for four-handed operation service
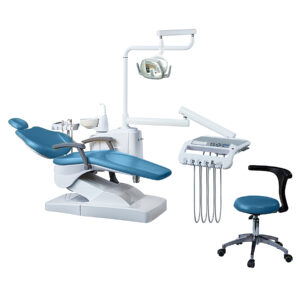
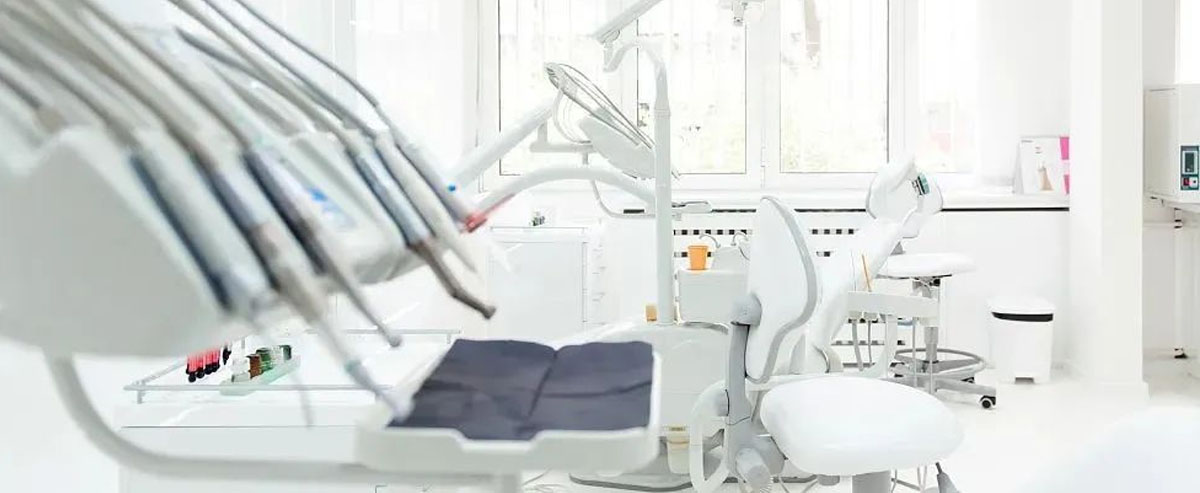
Horizontal double-side adjustable dental chair
Electricity or pneumatics should drive the tilting, return, and height adjustment of the dental chair. Each function should have a separate control key. Place the tilting and return keys on the edge of the chair back, near the patient’s head, for easy access by both the operator and the assistant.
ps:
- (1) Ensure the dental chair fully supports the patient’s head, arms, and body while lying on their back. This allows the patient to relax and receive treatment comfortably.
- (2) Rotation: The headrest should be able to rotate to facilitate filming or certain treatments.
- (3) The surgical chair, when fully returned, has a seat-to-floor distance with a maximum base height of 36 cm.
- (4) Multi-function: The assistant side of the surgical chair should have a strong suction device, a saliva ejector and a three-purpose spray gun; the doctor’s side should have a movable comprehensive treatment table, high and low speed turbine handpieces, a three-purpose spray gun and a scaler, and an adjustable surgical light.
Four-hand Operation
Doctor’s chair
Adjustable height, backrest at waist, stable base, and slidable.
Assistant’s chair
Adjustable height, adjustable height, sliding base, wide and stable base with footrest, high base, and armrest for forearm.
Mobile instrument cabinet
The slidable top of the mobile instrument cabinet serves as a workbench for placing instruments and treatment materials. The cabinet below contains various small instruments, materials and medicines necessary for treatment.
Fixed cabinet
Use the fixed cabinet to store infrequently used instruments, and utilize its surface as a writing table.
Sink or hand-washing basin
It is an essential equipment for oral treatment. It is best to have a switch that can be controlled by the knee, foot or wrist to eliminate re-contamination after washing hands.
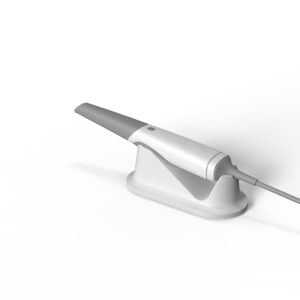
Three-purpose spray gun
It combines the functions of two instruments into one. The user can switch from one function to another with just the thumb button. The nozzle can rotate 360° to easily access all areas of the oral cavity. The removable nozzle can be sterilized by high pressure.
Adjustable surgical light
03 Doctor, nurse and patient position and movement
Four-hand correct position of the doctor
The doctor should have a balanced and comfortable position, with both feet flat on the dental chair floor. The thighs stay parallel to the ground. Shoulders remain level. Hands rest at heart level. Forearms stay parallel while working. The back is straight against the chair. The head tilts slightly forward. Eyes focus downward. The doctor’s eyes and the patient’s mouth stay 36-46 cm apart.
Dental assistant chair position
The correct posture of the chair assistant should adopt the balanced operating position. The balanced operating position (BHOP) is defined by D. Beach proposed that the line between the ischial and femoral foramen should be horizontal. The thigh should be 15° to the ground. The body’s long axis should be level. The upper arm should be vertical. The elbow should touch the ribs. The head should tilt slightly forward. The operating height should be at heart level.
Dental chair positions for patient
Position the patient to lie flat. Keep the chair backrest horizontal or raise it 7° to 15°. Ensure the spine is fully relaxed and the head is comfortable. Tilt the doctor’s head and eyes forward correctly so the oral cavity aligns directly below the doctor’s eyes. The maxillary surface stays parallel to the doctor’s body. The mandibular surface faces the doctor. The head stays level with the heart. The patient’s head must be against the end of the headrest.
Four activity areas
In order to better illustrate the positional relationship between doctors, nurses, equipment and patients. We imagine the positional relationship between doctors, nurses and patients as a clock face, with the patient’s face as the center, divided into four clock areas.

- The chair is between 7 and 12 o’clock. The operator’s common position is 11 o’clock. For the right mandibular posterior, 7-9 o’clock is used. For the anterior area, 12 o’clock is preferred.
- You can place a mobile cabinet or cart between 12 and 2 o’clock.
- Located between 2 and 4 o’clock. The assistant usually stays at the 3 o’clock position.
- Located between 4 and 7 o’clock. This is where the doctor and the chair assistant pass materials and instruments.
Position adjustment of doctors and assistants for different treatment areas
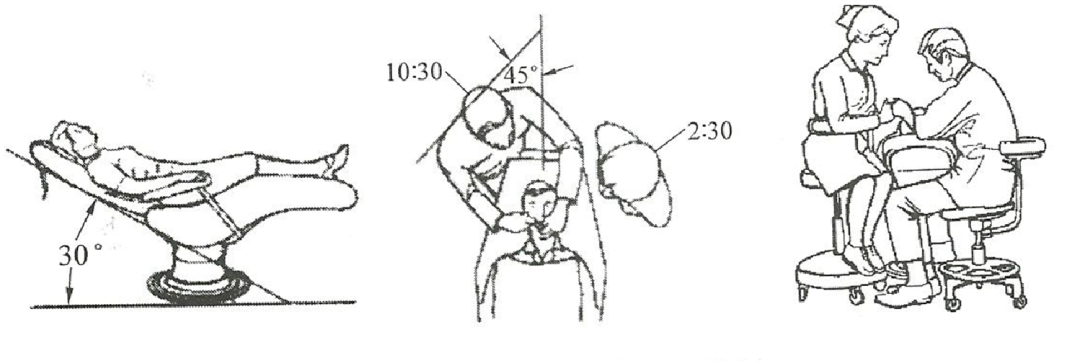
- (1) The doctor in the left mandibular posterior area is located at 10:30, 45° to the long axis of the patient or the chair. The chair assistant is located at 2:30. The chair is adjusted so that the backrest is 30° to the ground plane.
-
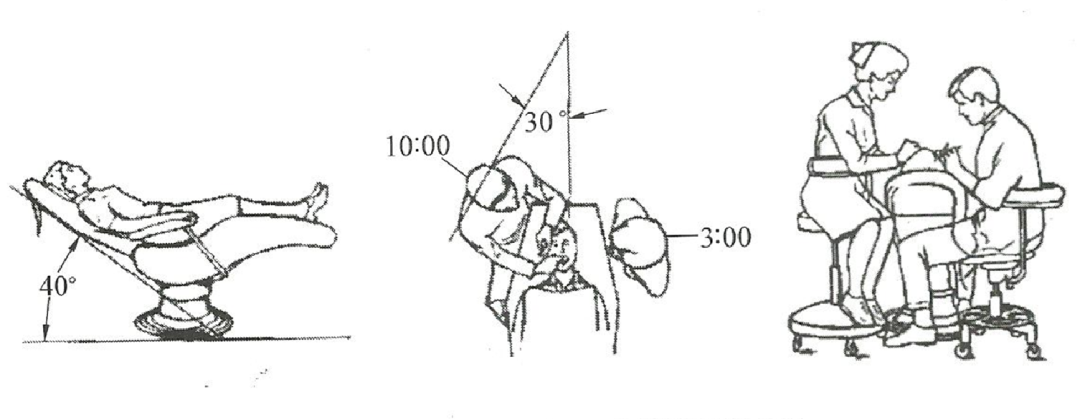
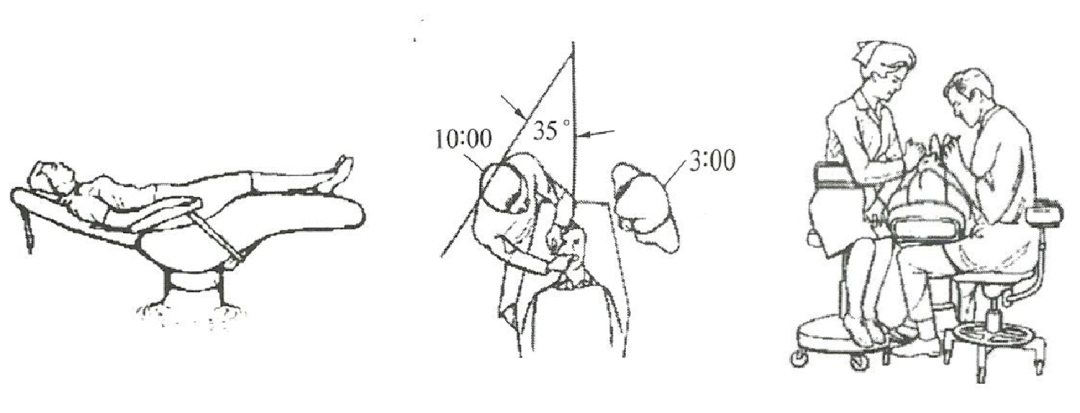
Four-hand Operation - (2) The doctor in the right mandibular posterior area is located at 10 o’clock, 30° to the long axis of the patient or the chair. The assistant is located at 3:30. The chair is adjusted so that the backrest is 40° to the ground plane.
-
four-hand operation - (3) The doctor in the left posterior maxillary area is at the 10 o’clock position, 35° to the long axis of the patient or the chair. The assistant is at the 3 o’clock position. Adjust the chair so that the mandibular plane is parallel to the ground and the maxillary plane is at a 45° angle to the ground.
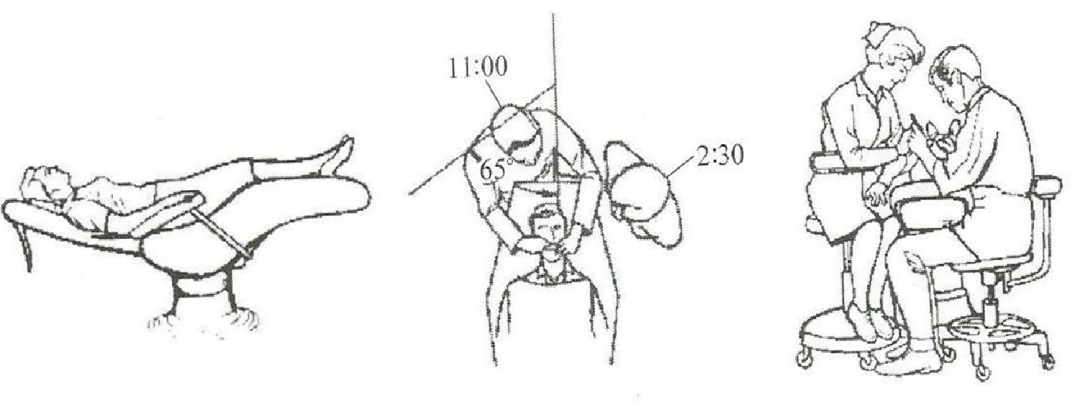
- (4) The doctor in the right posterior maxillary area is at the 11 o’clock position, 65° to the long axis of the patient or the chair. The assistant is at the 2:30 position. Adjust the chair so the mandibular plane is parallel to the ground and the maxillary plane is at a 45° angle to the ground.
04 Instrument transfer technology
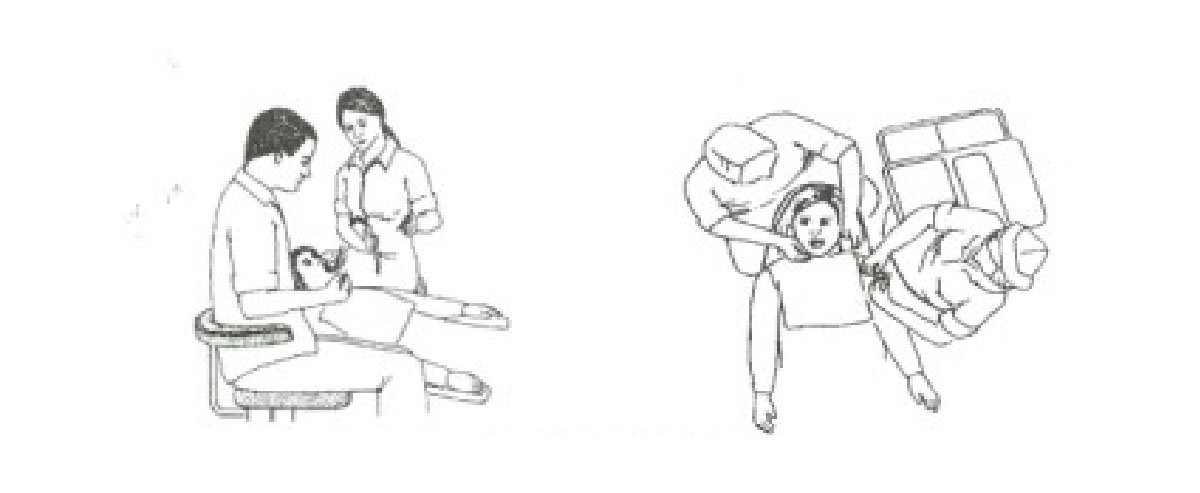
- (1) Use the standard parallel transfer method, that is, between the patient’s chin and upper chest, the elbow is parallel to the instrument in the doctor’s hand. Keep the transferred instrument parallel to the one in the doctor’s hand when exchanging instruments.
- (2) The assistant uses the left hand to transfer the instrument. Use the thumb, index, and middle fingers of the left hand to transfer the new instrument. Use the ring and little fingers to receive the used instrument. This allows for smooth exchange without collision.
- (3) During the transfer process, the assistant’s right hand can use the suction device to suck away saliva, water and debris or do other work.
- (4) Avoid transferring instruments over the patient’s head and face to ensure safety. 05 Saliva suction technology
Purpose of saliva suction
- (1) Keep the working area free of water, saliva and debris, and provide a clear and dry operating area for dentists.
- (2) Used to pull and push the soft tissue in the mouth to avoid damage from high-speed mobile phones and sharp instruments, ensure the operating space in the mouth, and provide the dentist with the best operating field.
- (3) Eliminate the discomfort caused by water mist, dust, etc. to the patient, and ensure the safety and comfort of the patient.
- (4) Saliva suction allows the patient to remain in the supine position for a long time, shortens the overall treatment time, and improves the work efficiency of the dentist.
- (5) Maintain clean air in the clinic to prevent potential infection between medical staff and patients.
Types of saliva extractors
Strong and weak suction
How to hold a saliva extractor
Palm-finger style: used to hold upper and lower posterior teeth instruments in the palm, with the third, fourth and fifth fingers tightly around the handle, the index finger around the handle 2/3 of a circle, and the thumb along the working end of the instrument. It is often used to hold three-way gun tooth extraction forceps.
Pen-holding style: used to hold upper and lower anterior teeth instruments between the thumb and index finger, with the middle finger placed underneath for support, and the end of the middle finger used as a fulcrum. It is often used to hold hand instruments and probes.
4 Basic position of the saliva extractor head Operation area: The saliva suction head is as close to and parallel to the buccal or lingual side of the working tooth as possible
Place the saliva suction head about 3mm on the lingual side of the pterygomandibular hyoid ridge in the pharyngeal area.