
Dental chair positioning is the cornerstone of efficient, safe, and comfortable dental care. Whether performing a routine cleaning or a complex surgical procedure, the alignment of the dental chair, patient, and operator directly impacts clinical outcomes, ergonomics, and patient satisfaction.
This article explores the science and art of dental chair positioning, offering actionable insights for practitioners to refine their workflow, enhance patient comfort, and prioritize musculoskeletal health.
🦷 1. Basic Principles of Dental Chair Positioning
-
Centered on the dentist’s operational convenience: Ensures a clear line of sight and smooth workflow for the dentist.
-
Based on patient comfort: Helps avoid excessive tension or physical discomfort for the patient.
-
Ensures adequate space for the assistant: Aligns with the four-handed dentistry principle

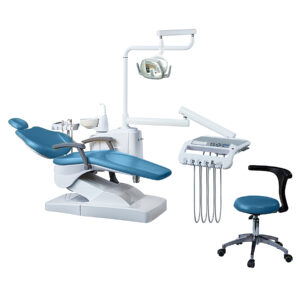
dental chair positioning
2. Common Positions and Adjustments of Dental Chairs
- Seat Height:Lower the backrest to slightly above the dentist’s elbow to avoid bending or hunching.
- Backrest Angle:A 30–45° incline is recommended for general procedures; it can be flatter for lower jaw work.
- Headrest Position:Adjust the headrest to support the patient’s neck and provide a clear view of the oral cavity.
- Backrest Recline/Incline:For upper jaw procedures, the backrest should be flatter; for lower jaw, raise it slightly to prevent the tongue from falling back.
3. Patient Positioning: Balancing Comfort and Accessibility
Patient positioning is not a one-size-fits-all approach. It must adapt to the operator’s technique, procedure type, and target oral region.
Common Patient Positions
- Upright Position: Ideal for consultations or postoperative instructions.
- Semi-Reclined (45° tilt): Balances comfort with visibility for anterior procedures.
- Supine Position: Maximizes access for most restorative and surgical work.
Critical Rule: The patient’s head, knees, and feet should align horizontally in the supine position. Avoid lowering the head below the feet except in emergencies (e.g., syncope).

4. Operator Position Of Dental Chair: The Clock Concept for Right- and Left-Handed Dentists
The operator’s position of dental chair relative to the patient—often visualized using clock positions—dictates efficiency and ergonomic safety.
Right-Handed Operators
- 7 o’clock (Right Anterior):
- Best for mandibular anterior teeth and right posterior quadrants.
- Patient’s head tilted 45° with slight rotation toward the operator.
- 9 o’clock (Right Lateral):
- Optimal for buccal surfaces of right posterior teeth.
- 11 o’clock (Right Posterior):
- Enables indirect mirror visualization of palatal/lingual surfaces.
- 12 o’clock (Direct Posterior):
- Reserved for lingual surfaces of mandibular anteriors.
Left-Handed Operators
Mirror the above positions (e.g., 5 o’clock for left anterior access).
5. The Ergonomic Golden Triad: Chair, Patient, and Operator Alignment
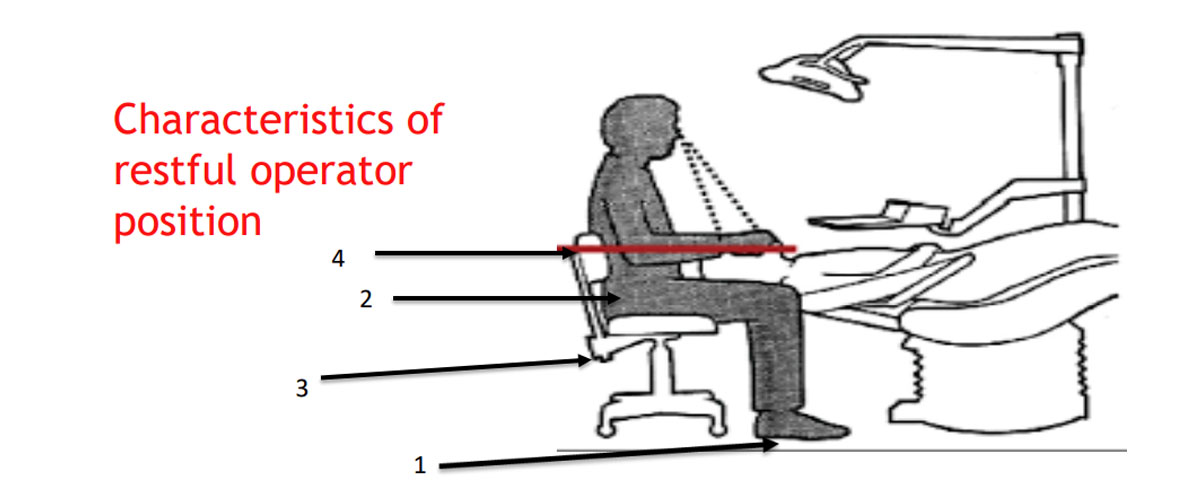
The specific positioning guidelines are as follows:
- Chair height: Operator’s thighs parallel to the floor.
- Lumbar support: Prevents lower back strain during prolonged procedures.
- Instrument tray placement: Within arm’s reach to avoid overextension.
- Lighting: Shadow-free illumination of the operative field.
- Temperature and ventilation: Mitigate patient anxiety and operator discomfort.
Pro Tip: Avoid resting forearms on the patient’s shoulders or hands on their face—this compromises stability and professionalism.
✅ 6. Specific Recommendations For Dental Procedures
| Procedure Type | Recommended Chair Position & Angle |
|---|---|
| Scaling (Teeth Cleaning) | Slightly raise the backrest to allow proper drainage of water. |
| Filling | Tilt the patient’s head slightly backward with the backrest in a flat position to ensure a clear view. |
| Extraction | Adjust the backrest angle according to the location of the tooth being extracted. |
| Pediatric Treatment | Avoid reclining the chair too far back; consider the child’s psychological comfort. |
7. Special Considerations for Dental Chair Positioning
Maxillary vs. Mandibular Procedures
- Maxillary arch: Orient the occlusal plane perpendicular to the floor.
- Mandibular arch: Tilt the occlusal plane at 45° for optimal visibility.
Patient Psychology
A relaxed patient is a cooperative patient. Subtle adjustments—like offering a neck pillow or explaining positional changes—build trust and reduce gag reflexes.
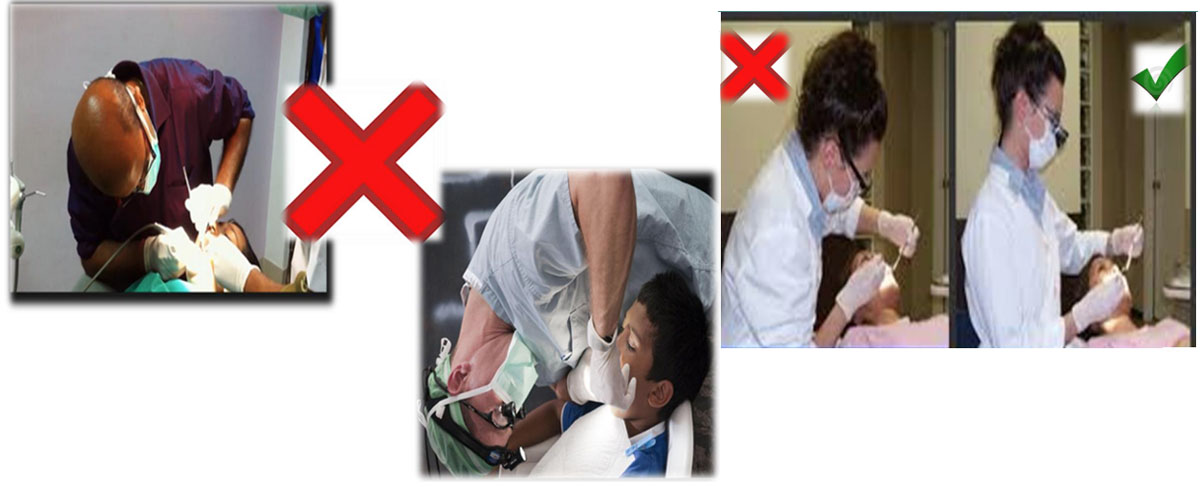
Postural Pitfalls to Avoid
- “Hunching” over the patient: Strains the cervical spine.
- Asymmetric weight distribution: Increases risk of hip and lower back injuries.
- Static postures: Take micro-breaks to stretch and reposition.
position of dental chair
FAQ Section
Q1: How often should dental chair positioning be reassessed during a procedure?
A: Reassess every 15–20 minutes or when switching quadrants.
Q2: Can improper chair positioning affect anesthesia efficacy?
A: Yes—poor alignment may alter blood flow or nerve compression, impacting local anesthesia.
Q3: What’s the simplest way to test ergonomic alignment?
A: Use the “90-90 rule”: Knees and elbows bent at 90°, feet flat on the floor.
Start your one-stop shopping journey for dental medical equipment and contact ESCO for expert consultation and customized solutions!